Project summary
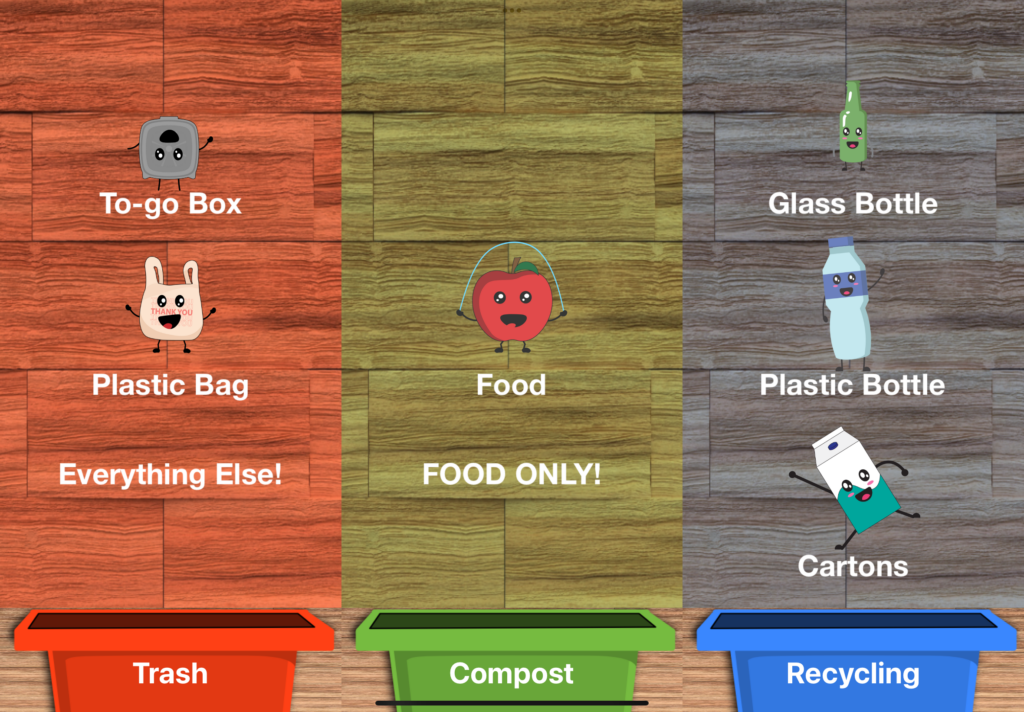
Project GreenWisp is an easy to use affordable digital waste assistant iPad app designed for high traffic waste stations. GreenWisp aims to reduce recycling and compost contamination through the use colorful animated waste characters and modern object detection technologies.
Background

In late 2022, I learned that CU was eliminating non-food compost from their waste systems. The reason for this was a change in policy from A1 Organics, a major local compost processor for the Boulder area. This was due to high contamination rates of compost waste. Having learned this and knowing that I myself struggle to know what goes in compost, trash and recycling bins, I thought it would be an interesting experiment to utilize machine learning technologies to potentially create a system that could tell a user where items go.
Spring 2023 Machine Learning Independent study
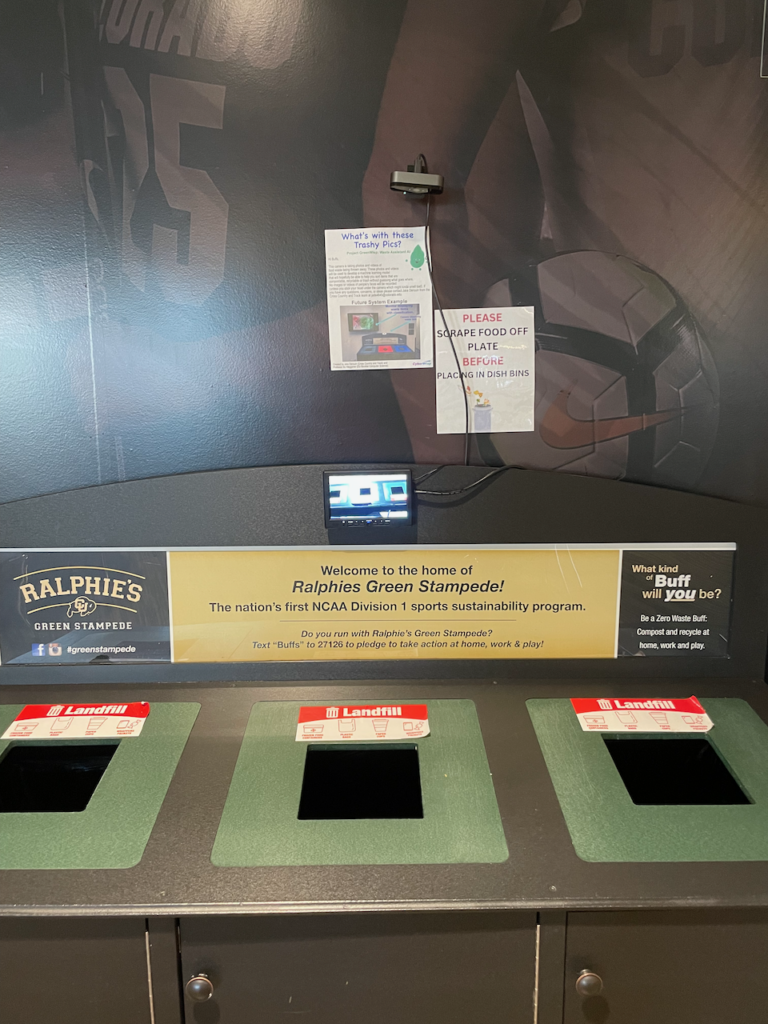
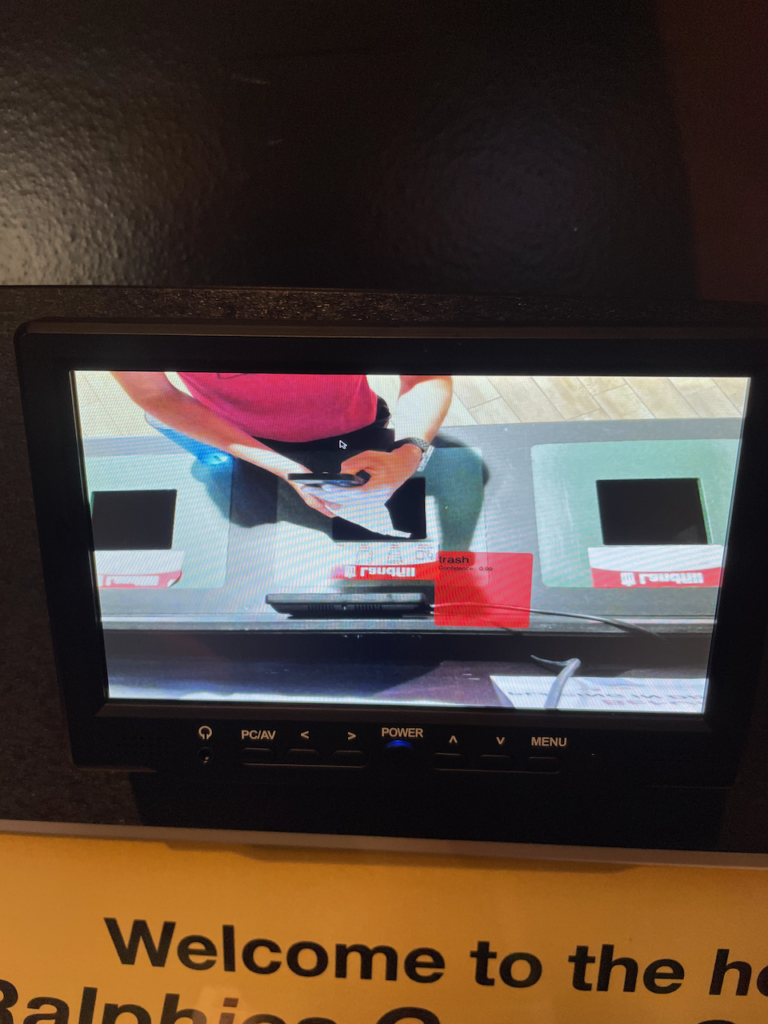
During Spring of 2023, I pursued an independent study to learn about machine learning technologies for this task with a focus on object detection. Over the course of the semester, I attached a camera and a computer to a high traffic waste station found in the athletic department dining hall. I had the camera take photos of waste items as people were disposing of them via motion detection. I collected upwards of 800,000 photos and practiced using tools such as TensorfFow and more. With these photos, I took a few hundred of them and labeled objects found in the photos as either trash, compost, or recycling. I had the goal that at the end of the semester, I would attach a display to the waste station that would show classifying bounding boxes on items as they are being thrown out. As the end of the semester drew near, I was finding it very difficult to get TensorFlow to the work well enough to reach my goal so I opted to use the Apple’s CreateML API to classify 3 item categories: Trash, Food, and reusable plates. Create ML enabled me to quickly deploy a proof of concept Mac app for a few weeks at the end of the semester. Despite some bugs with coordinate drawing on the small monitor I used, reception was good although I noticed quite a few issues.
Issues from the proof of concept
One of the main problems with my approach was that training a model to identify waste categories would only allow me to use that model at one particular location. Items that are recyclable or composable in one location may actually contaminate those same bins in other locations and should be thrown in the landfill instead. Another issue was that given my limited labeling resources, labeling thousands of items to produce a highly accurate machine learning model given that waste items are frequently of different sizes, shapes and colors was not feasible. If I couldn’t make an accurate model for a system that relies entirely on ML, I wouldn’t be able to help reduce contamination.
Fast forward to Fall of 2023
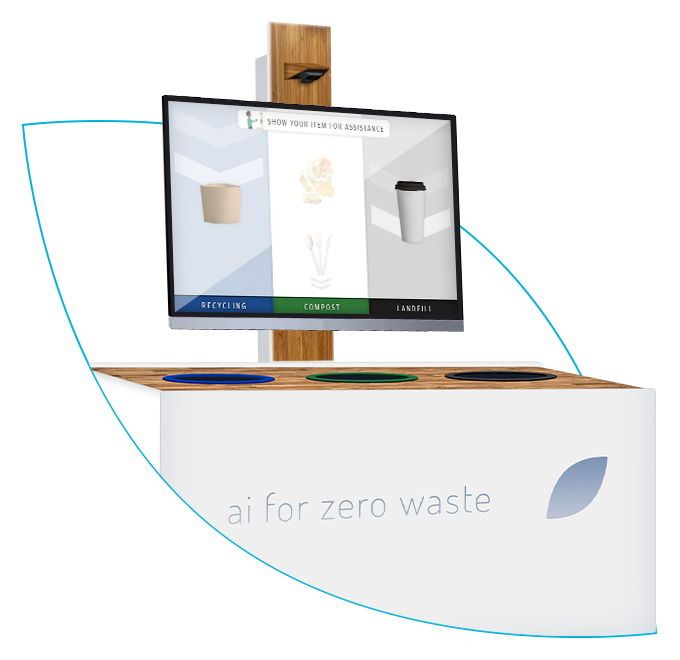
Having identified some flaws with my previous approach towards this idea, I brainstormed a new approach that addresses these concerns. During our precedent research phase of the capstone process, I found that earlier in 2023 a product was launched called Oscar Sort. This product had a similar setup to what I had previously envisioned that used machine learning to identify waste objects. Another precedent I found was the EvoBin. This system did not use artificial intelligence at all but rather was a screen designed to be placed above waste stations that cycled through a prerecorded video with images of specific items to that location and which bin they belong in. The EvoBin would also occasionally show trivia or fun facts to keep users interested. When looking at these precedents what stuck out to me the most was how all of the precedents we researched required additional hardware to be installed by professionals and were very expensive with some of them costing tens of thousands of dollars. All of the precedents also seemed to use the same realistic non-animated images for displaying waste items.
Brainstorming

After completing the precedent research phase, I began brainstorming how I could create something that achieves something similar to the precedents I identified while doing it in a novel fashion that addresses their shortcomings. The most significant shortcoming in my opinion was the high cost of hardware found in these precedents. Having previously used Apple’s object detection technologies for my first attempt at this project last year, I thought it would be interesting to create an application that could be run entirely on an iPad. By running the app on an iPad, I could achieve similar results for a significantly lower price and with no additional hardware required. Despite the easy to use Apple CreateML suite, knowing my limited ability to label tons of data on my own for highly accurate object detection models for waste, I thought that it would be interesting to take EvoBin’s approach of creating engaging digital signage as the first priority for project but spice it up with less “industrial” style images that all of the precedents have. I have always been interested in the cute style of some Japanese animated characters such as Pokemon. This style is commonly referred to as Kawaii style and to me, I always felt like characters drawn in this style would get my attention. I thought perhaps I could incorporate that kind of character style into this project. As for the AI features, I decided that object detection of items could still be present in the project but it would take a secondary role in which select items that could be successfully identified would have an additional animation to tell the user what item they currently are holding.

What’s in the name?
The company name I use for all of my technology services is CyberWisp with the word wisp being a synonym for a ghost. My branding assets include some cute and colorful ghost like characters. Given that this project also has cute characters, I could continue the naming pattern with the name GreenWisp. Having done some additional brainstorming, I had come up with a general structure for the project and settled on 4 key goals.
4 Key goals
Design an iPad app that:
- Utilizes cute kawaii style animated characters to get the attention of passerby throwing away waste to help them accurate put their waste in the correct bin.
- Incorporate machine learning object detection to identify items in real time when feasible.
- Allow for easy customization by waste management administrators for their specific waste station configuration.
- Require no additional hardware outside of an iPad.
Getting into groups
Because I have around 5 years of iOS mobile app experience, I felt pretty confident to tackle the technology challenges on my own. However, my artistic ability to create and animate original cute looking characters that don’t look like they want to eat your soul was lacking. That’s why I sought out Ian Rowland and Nik Madhu to be in charge of creating the character animations. Both Nik and Ian had experience with Adobe After Effects and were equally passionate about the using their skills to work towards a project designed to fight climate change.
Diagrams
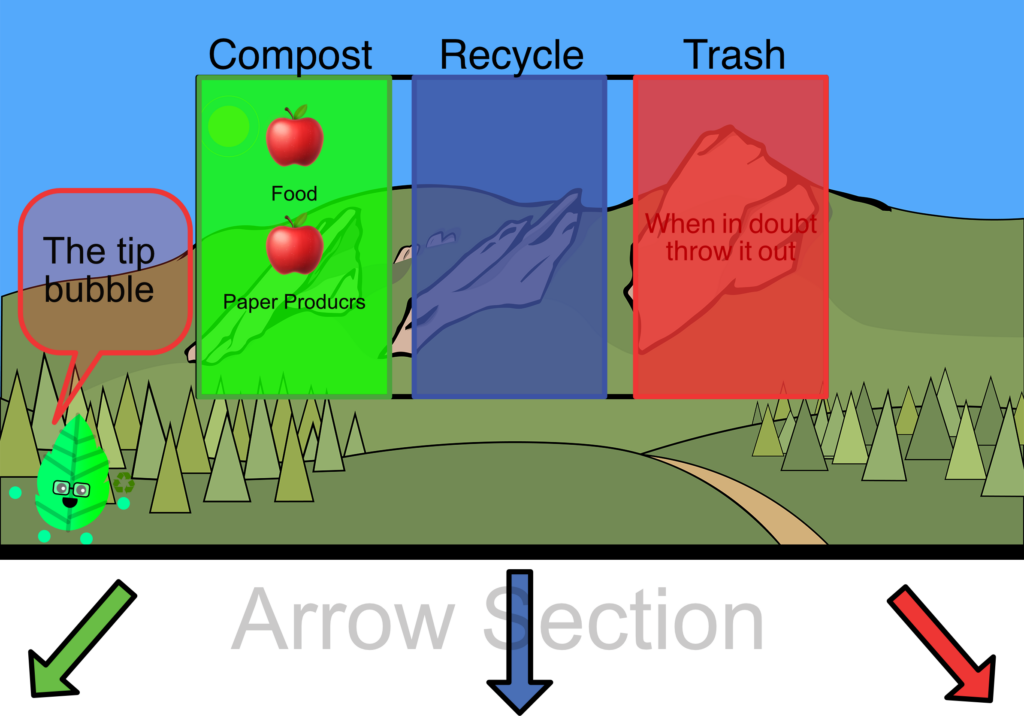
Before building an app, I usually will mock up what the app will look like that way I can start to figure out how the pieces will fit together from a user interface perspective and a coding perspective. We based the design of our sketches off of ideas from precedents such as EvoBin and Oscar Sort. We opted for a column interface where each column represented a particular waste category such as trash, compost or recycling. Since waste stations can vary by the number of categorical bins and the position of those bins, we needed to allow for easy customization. We quickly found that the screen real estate of a 10.9 inch iPad device is limited for all the information we want to display to be easily read from an arms length so every design decision had to be carefully made and some features had to be cut. One of the original ideas was incorporating Evo Bin’s trivia and other fast facts into the app but we quickly found that this would be very difficult to do because of the limited screen real estate. We decided on displaying three items at once per category and allowing up to four categories of waste to be displayed at one time. We also included arrows in our diagrams that could be customized to point in the direction of a particular bin.
Acquiring Materials
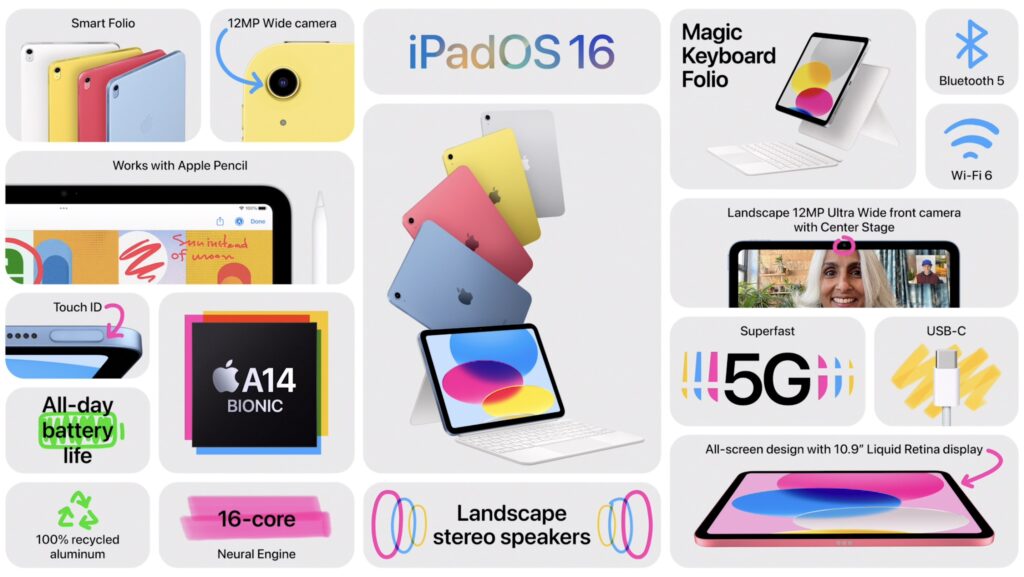
Apple has numerous iPads available for sale each with different screen sizes and capabilities. Since one of my project’s focuses is affordability, I thought it would be wise to design my app targeting one of the cheaper iPads available rather than the high end iPad Pro’s. By doing this I could ensure that the app could work on as many devices as possible. After doing some research, I found that the 2nd most affordable iPad has an ultra wide angle front facing camera that could be very useful for classifying items in front of a wide waste station. I ended up purchasing a 10.9 inch iPad as well as a high speed SSD drive for moving large amounts of images when training machine learning models.
Firing up Xcode.
Since I was creating an iPad app (with the additional ability to run on macOS), all of the code was going to be written in Xcode using the Swift programming language. I also decided to use SwiftUI to create the views (which took a little bit to get used to since most of my expertise has been with working with UIKit). As a mobile app developer, one of my first tasks when starting a new app is establishing how the app’s data will be structured and accessed so I don’t have to rewrite and rethink large amounts of logic later.
Structuring the data

When structuring the data, I concluded that the waste columns were by far the most important data structure in the app. Each column would represent a particular waste category such as trash compost or recycling. Waste admins can name these columns from the configuration menu as well as set the background color. Most importantly, items can be assigned to each column. Since I was going to be working with animations, each column object would also manage a SpriteKit view (or SKView) to control animations.
For saving the data, I figured I would use a single JSON file that would be loaded whenever the app starts.
Starting the UI: Configuration Screen
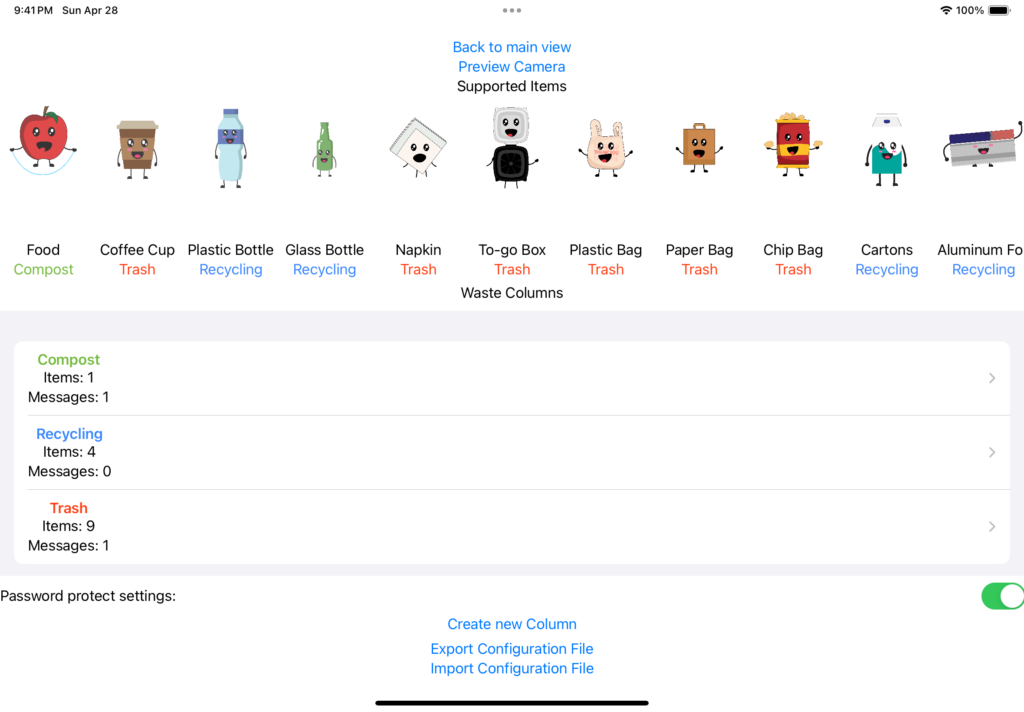
Before I could work on the UI that would display items, I had to build a method of creating waste categories and assigning items to those categories. I decided to do this by designing the settings screen first. The settings screen shows all of the waste items that are available to categorize and allows you to create a waste column, customize the color, name and which items belong to that particular category. I used quite a few SwiftUI lists to allow easy selection of data. The configuration screen would be accessed by a simple tap from the main screen.
Displaying items
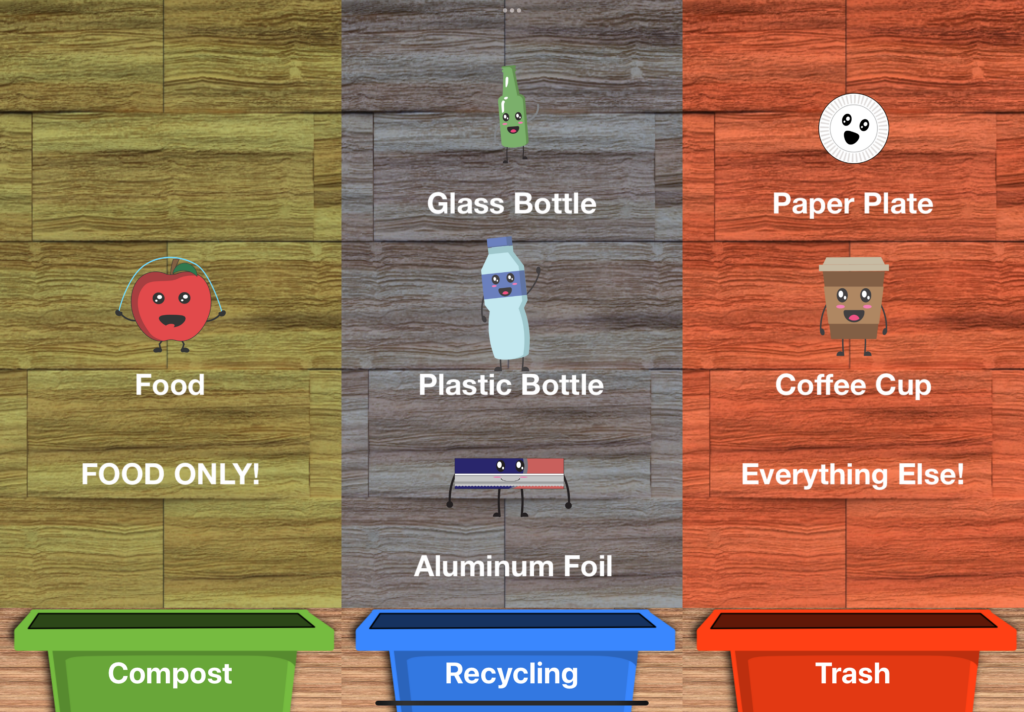
Now that the configuration screen was complete, my next task was displaying items on the screen. Because we were limited in screen size, I thought it would make sense to show only 3 items at once per category. Items would be displayed with their animation (or a static image at this point in time) as well as a label of what the item is below it. Categories with more than 3 items would rotate out items out every 5 seconds by fading the items. I was able to achieve this by creating “waste groups”, essentially groups would reference up to 3 items in a category and would be able to rotate through them. This would also allow me to force a particular waste group to appear at any time which would be needed later for object detection.
Dropping the arrows and the animated backgrounds

While my primary job in this project was working on more of the technical pieces and UI, I did have to make some aesthetic design decisions. Originally I thought it would be useful to have arrows present in the app that could be set to a specific direction referencing the position of the actual waste station. Over time, I found that the arrows were taking up too much screen space so I decided to remove them. In place of the arrows, I added in waste bin images that would take a fraction of the space at the bottom of the screen (and looked significantly better). Additionally, I had placed an animated SpriteKit background effect for every column that was a bit distracting. I ended up replacing those animations with a wooden texture and coloring that according to the user’s specified column color.
Adding in animations
Now that Ian and Nik had some animations complete, I needed to add them into the app. Because each category has a background color, I could not simply loop a video of each character’s animation as .mp4, .mov and other video formats don’t support transparency. Instead, I exported a sequence of png images from each character’s After Effects file and added them into Xcode to be loaded as a Sprite’s texture atlas.
Object Detection

One of the main goals of this project was to add waste item recognition capabilities using object detection. At this point in time, the app was able to successfully cycle through animations of items but had no object detection features yet. Since we were planning on doing our user testing in the CU Boulder Athletic’s dining hall, I thought I would target two common contaminant items from the Fueling Stations: black togo containers and Ozo coffee cups. To get the machine learning model working I took around 150 photos of these two items in different positions. Because the iPad was going to be mounted on the Fueling Station waste station, I put the iPad up on the waste bin to take the photos. I used an automatic photo taker app to take the photos in quick succession with a 3 seconds delay in between each photo for me to rotate the item into a unique position. I then labeled them with RectLabel by drawing bounding boxes on these images.


The process of labeling images is very tedious and took a couple of hours as I wanted to ensure that the bounding boxes were tight around the items to ensure the greatest accuracy. After labeling them, I imported the images into CreateML and my computer whirled up its fans to train the object detection model. The resulting model seemed to have good accuracy according to CreateML.
Incorporating the ML model into the app
Now that I had a trained model file, I needed to get the model to work in the app. For IOS platforms, using camera features generally requires you to use AVFoundation. This is one of the most confusing frameworks that I have worked with on iOS. Luckily, Apple had an example app called Breakfast Finder available that could identify certain foods via object detection. I was able to repurpose some of Breakfast finder’s code and attempt to figure out how it works. After a bit of trail and error, I successfully got the debug console to print the detection inferences. Interestingly, unless you set the confidence level up a bit, the console will repeatedly spam random detections. This single variable was something that I would need to play around with.
Getting the console to print detections was nice but I needed something to happen on the characters when the item the character represents was detected that the user would be able to see. I decided an easy animation to do would be to have the characters grow and shrink in size repeatedly when an item was detected. To achieve this, I had the app look for items via the ultra wide camera and then if one is detected, determine which waste column it belonged in and then force that column to show that item on the screen and trigger the animation for a minimum 0.5 seconds with the animation looping if that item remains detected.
Waste Messages
While my goal was to include a large swath of items to display, I realized that I might not be able to animate every item. Additionally, some users might just be in such a big rush that they don’t have time to look at the items that belong in each bin. To attempt to solve these two issues, I added customizable labels to the app. These labels would be created by a waste admin and had two modes: persistent, or rotating. In persistent mode, these labels would always be displayed on the screen in place of one of the animated items. Waste admin’s can set the position of the persistent labels to be on the top of the screen middle or bottom. Persistent labels are useful for messages such as “TRASH ONLY” or “NO FOOD” In rotation mode, the labels act like items just without an image. The labels will rotate as if they were another item.
Deploying a demo into the athletic department
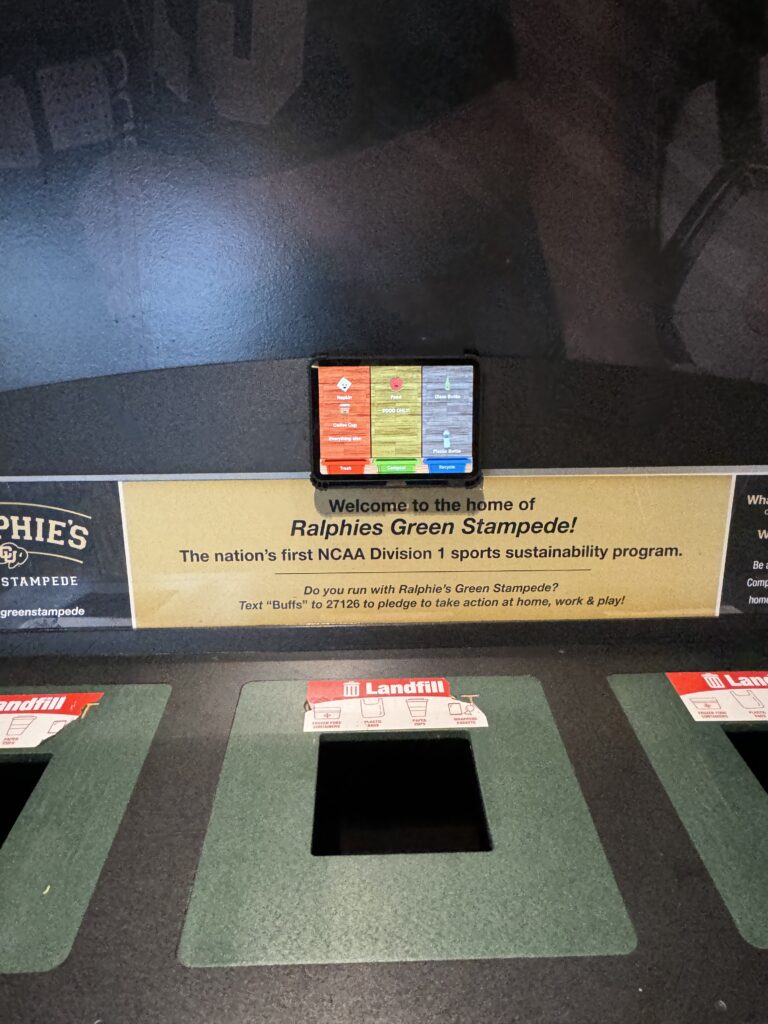
During our capstone class, we had to do multiple forms of user testing. For one of our user tests, we decided to observe athletes in the athletic department interacting with the GreenWisp system and gather feedback from observations or interviewing athletes directly. Over spring break I set up the iPad on a waste station in the athletic department. I achieved this by using some industrial Velcro, and running an extension cord from the nearest outlet to the iPad.
After setting up the system, we briefly interviewed athletes in the fueling station about their experiences. We interviewed some who were at their tables, some just before throwing items away, and others just after throwing items away. We received the following testimonials:
- Some individuals used another waste bin and did not interact with the system.
- Most individuals thought that the characters were cute and not uncanny.
- Most individuals said that they have looked at the system for help in sorting their waste at least once in the past week.
- A few individuals said they successfully had their items identified by the system.
- Feedback of the system was positive.
Other things we took away from this experience:
- Users liked the character designs
- We could improve our ability to get user’s attention potentially through identifying when they walk up.
- The object detection works but is a bit limited due to only supporting 4 items currently.
- We could improve the animation when an item is detected so that it can get the users attention better.
- Users only spend a small amount of time at the waste bin even when interacting with the system.
- Some users don’t know about the ability for the iPad to detect items. We should potentially communicate that better.
Import and exporting configuration

With the focus on adding additional customization options to the app, it became obvious that someone configuring the system might want an easy way to copy their preferences over to another iPad running GreenWisp. Because I had previously setup everything to be saved as one giant JSON file, it was super easy to add the ability to import and export the configuration to send to another device. I initially considered doing this via a QR code, but unfortunately, the JSON files were way too large. In the future, I could potentially use a QR code by having the device upload the configuration to a server and then giving a generated link as a QR code for devices to download that user’s configuration.
Fixing the RAM issue

As Ian and Nik continued to push out expressive animations of different waste characters for me to add to the app, I eventually ran into an issue with the app started to crash within a few seconds after launch. I quickly determined that this was an issue relating to running out of memory on the iPads. The iPad we were using has a ram limit of around 4 GB and we were quickly exceeding that threshold due to having so many high-quality animations present in the app. I tried a few methods to fix this, one of which involved offloading all of the SpriteKit animation frames whenever an item was rotated out from being displayed. This fixed the ram issue but caused animations to be extremely choppy and lots of frames to drop. I realized that I needed to make the file size of each items png animation frame smaller. So I went back into adobe after effects and re-exported every single item with a lower quality on the PNG sequence images. This process took some time, but eventually I was able to significantly reduce the amount of ram used without dropping frames.
Password locking the configuration page.
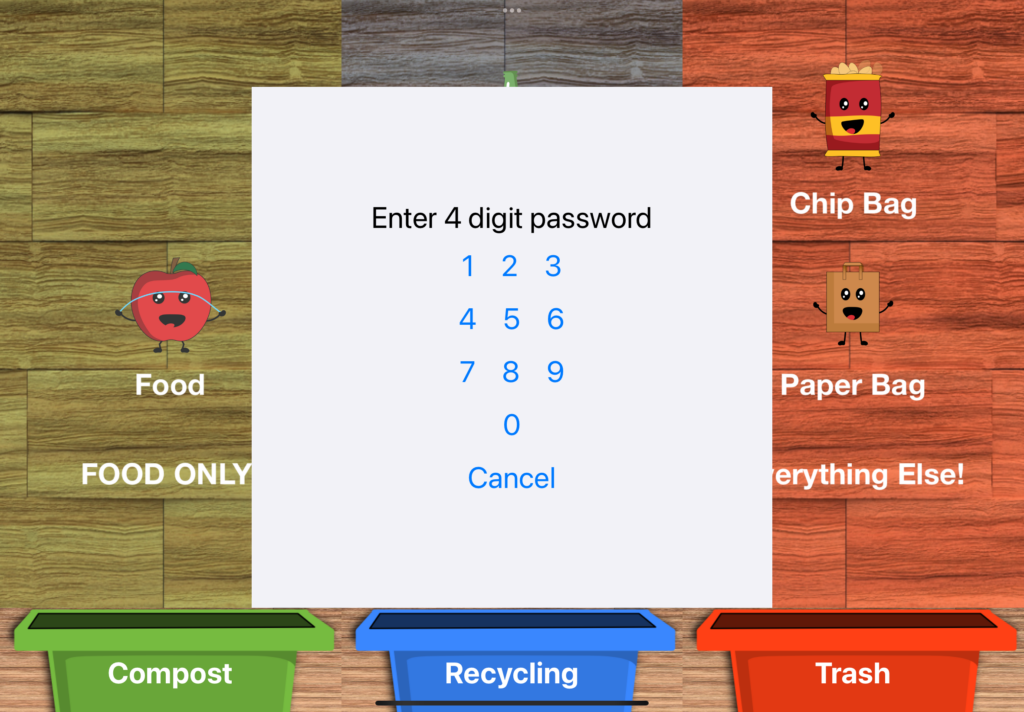
After deploying a demo into the athletic department, I would occasionally come to a meal to see that the app was stuck on the settings page due to someone attempting to interact with the iPad via touch. I needed a way to prevent non waste admins from accidentally opening this page and changing settings. I added in a password lock feature. Waste admin can optionally lock the configuration screen with a password that they can set. When a password is set, tapping the screen, when it is showing waste items will display a password prompt. If no action is taken within 15 seconds the prompt will disappear.
Final tweaks
Towards the end of the semester, I worked on adding additional items for waste classification. I was able to train a model that could now successfully identify chip bags and cartons in addition to the previous togo container and coffee cup. I also continued to add in new character animations as Nik and Ian completed them.
What’s Next
As the semester concludes I plan to continue this project in the future. I aim to release this app on the App Store within the next few months. Before releasing I still need to:
- Fix some occasional crashes
- Add in the ability to switch cameras
- Add in a camera preview feature for seeing what the camera sees for waste identification.
- Allow for enabling and disabling object detection features for specific items.
- Have an additional animation or state change when the device detects an approaching person.
- Some sort of tip or interesting fact feature.
- Expansion of detectable items.
- Create marketing materials.